How to Upload and Convert Bank Statements in BankToBooks
Published
4 min read
A short walkthrough for uploading bank statements in BankToBooks.
Quick conversion
For a single statement export:
- Open the Convert page.
- Choose a PDF, CSV, XLSX, OFX, or QFX statement file.
- Run the conversion.
- Download the parsed transactions.
Customer workflow
For customer work, start from the Customers page and open the customer record before uploading statements.
For help creating a customer and choosing its template, see the templates guide.
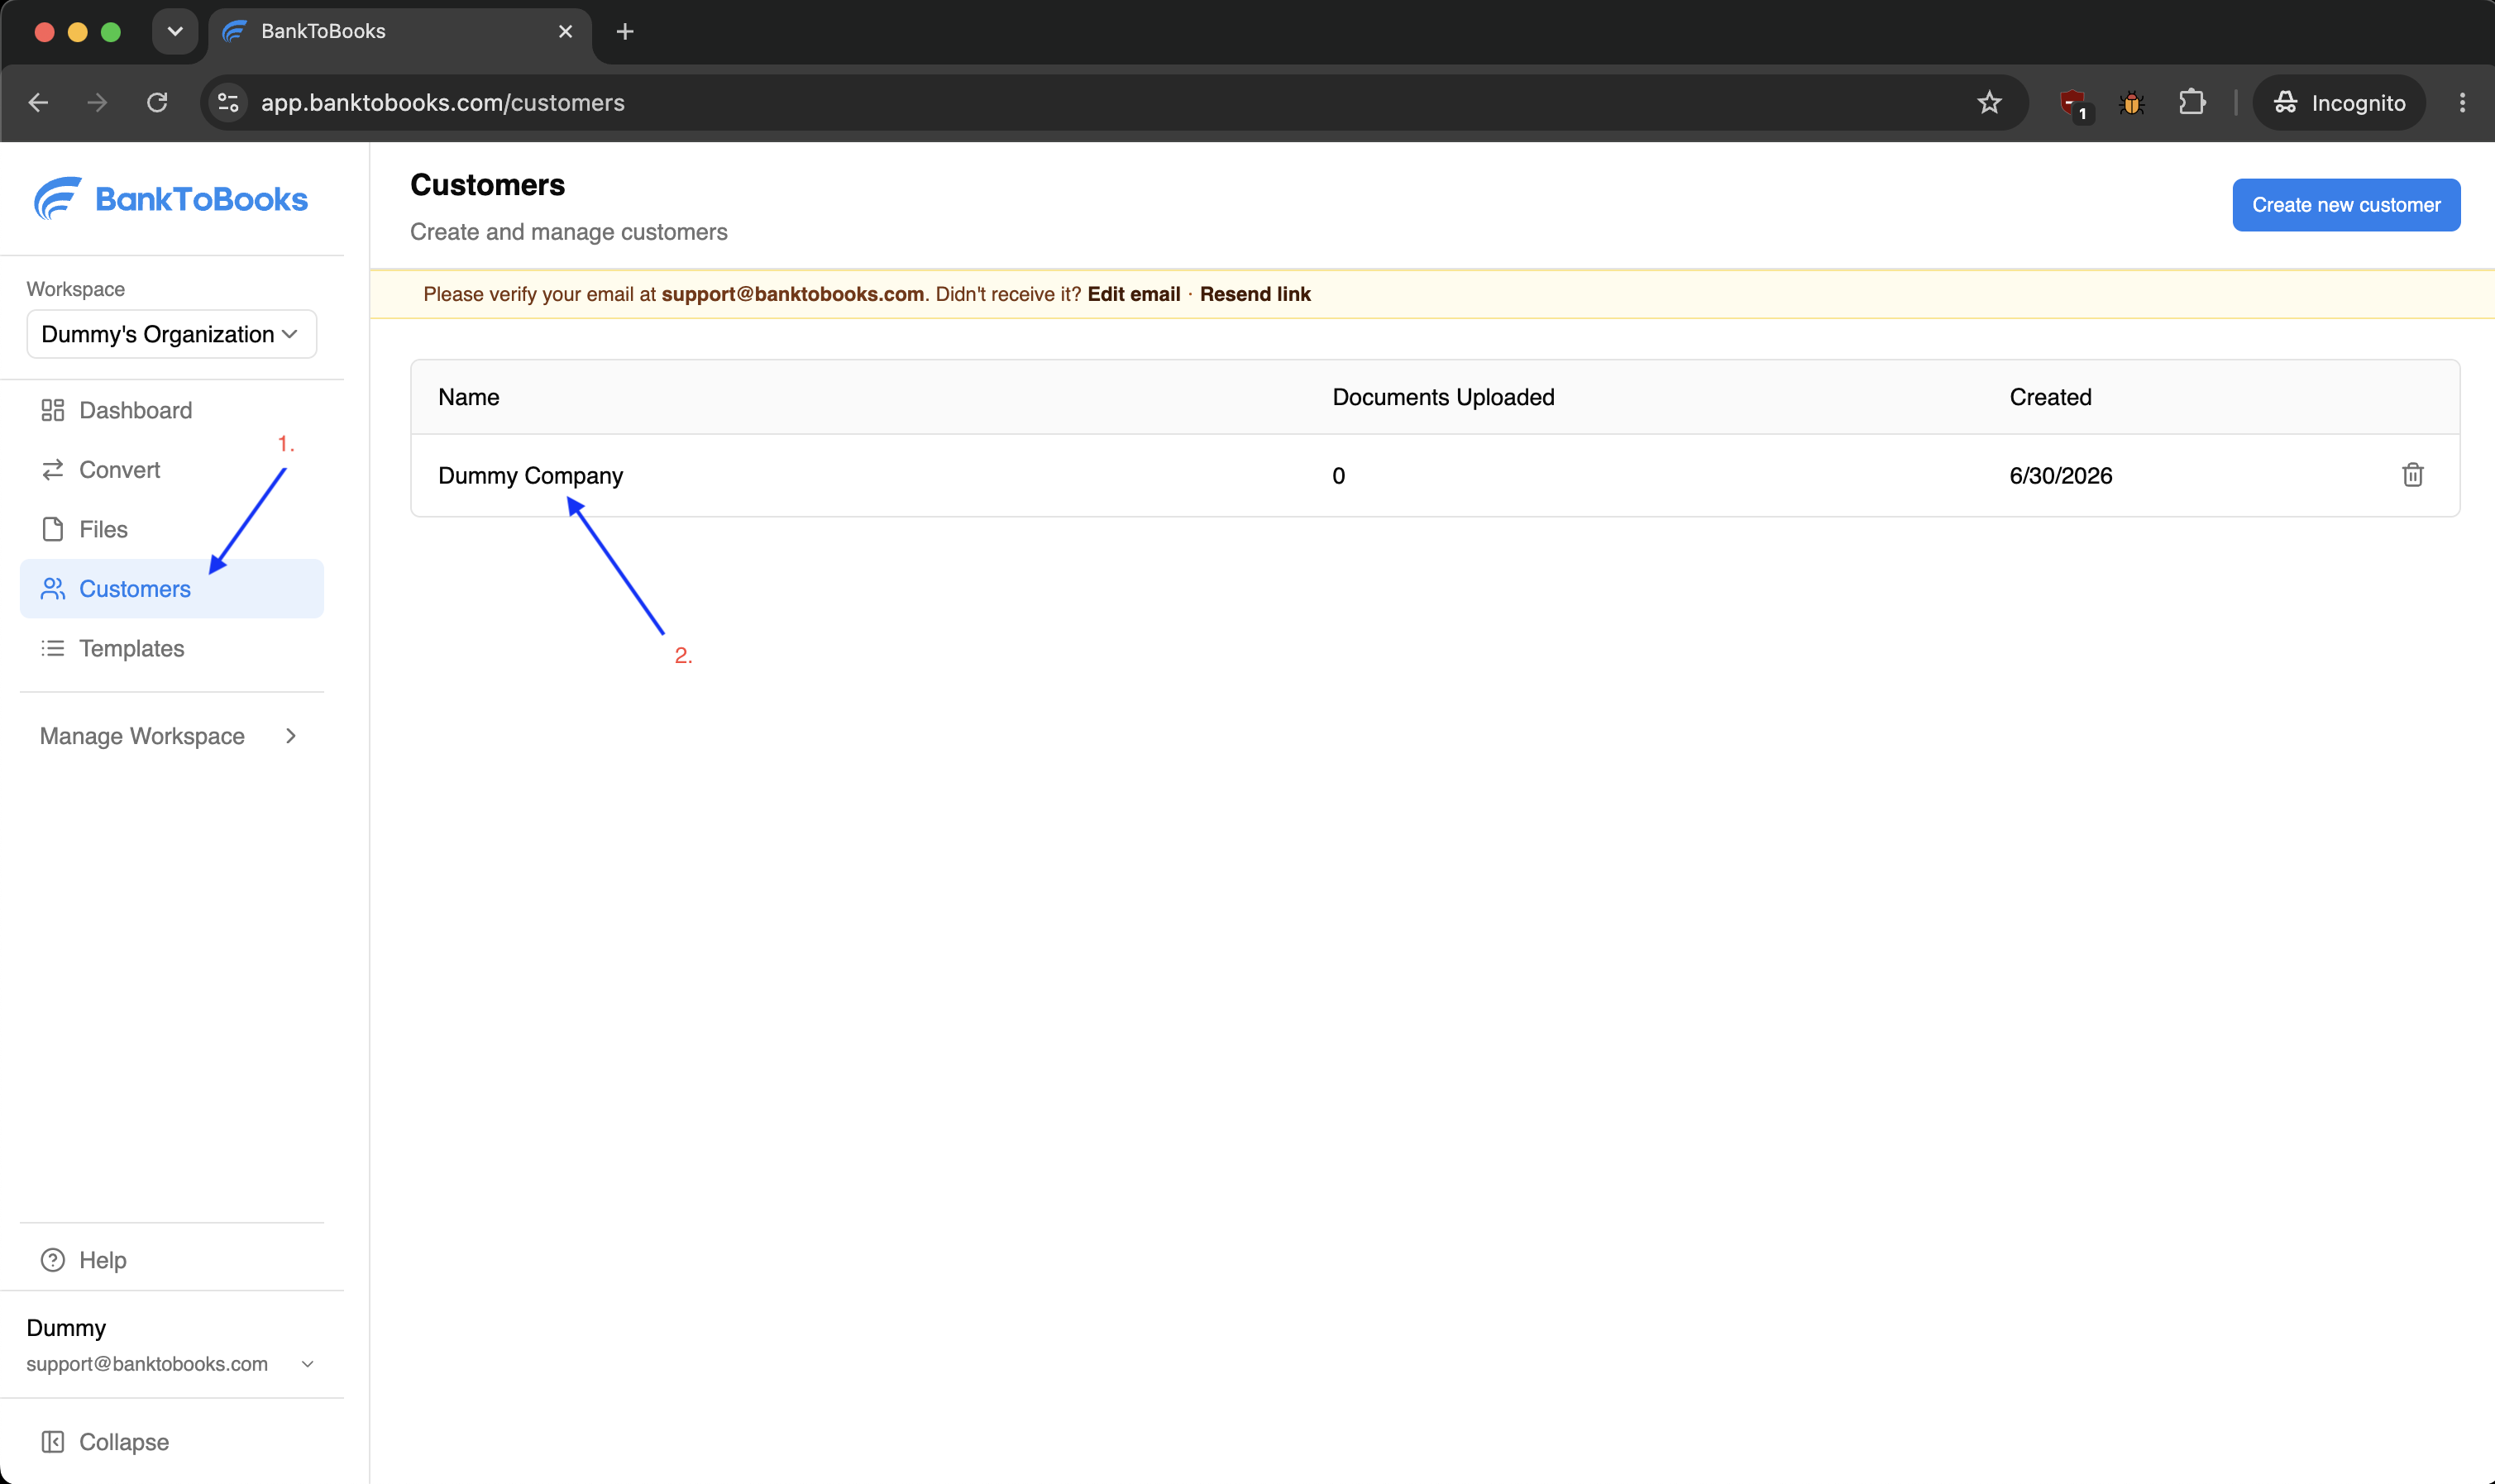
Step 1: Open the Customers page, then select or create the customer.
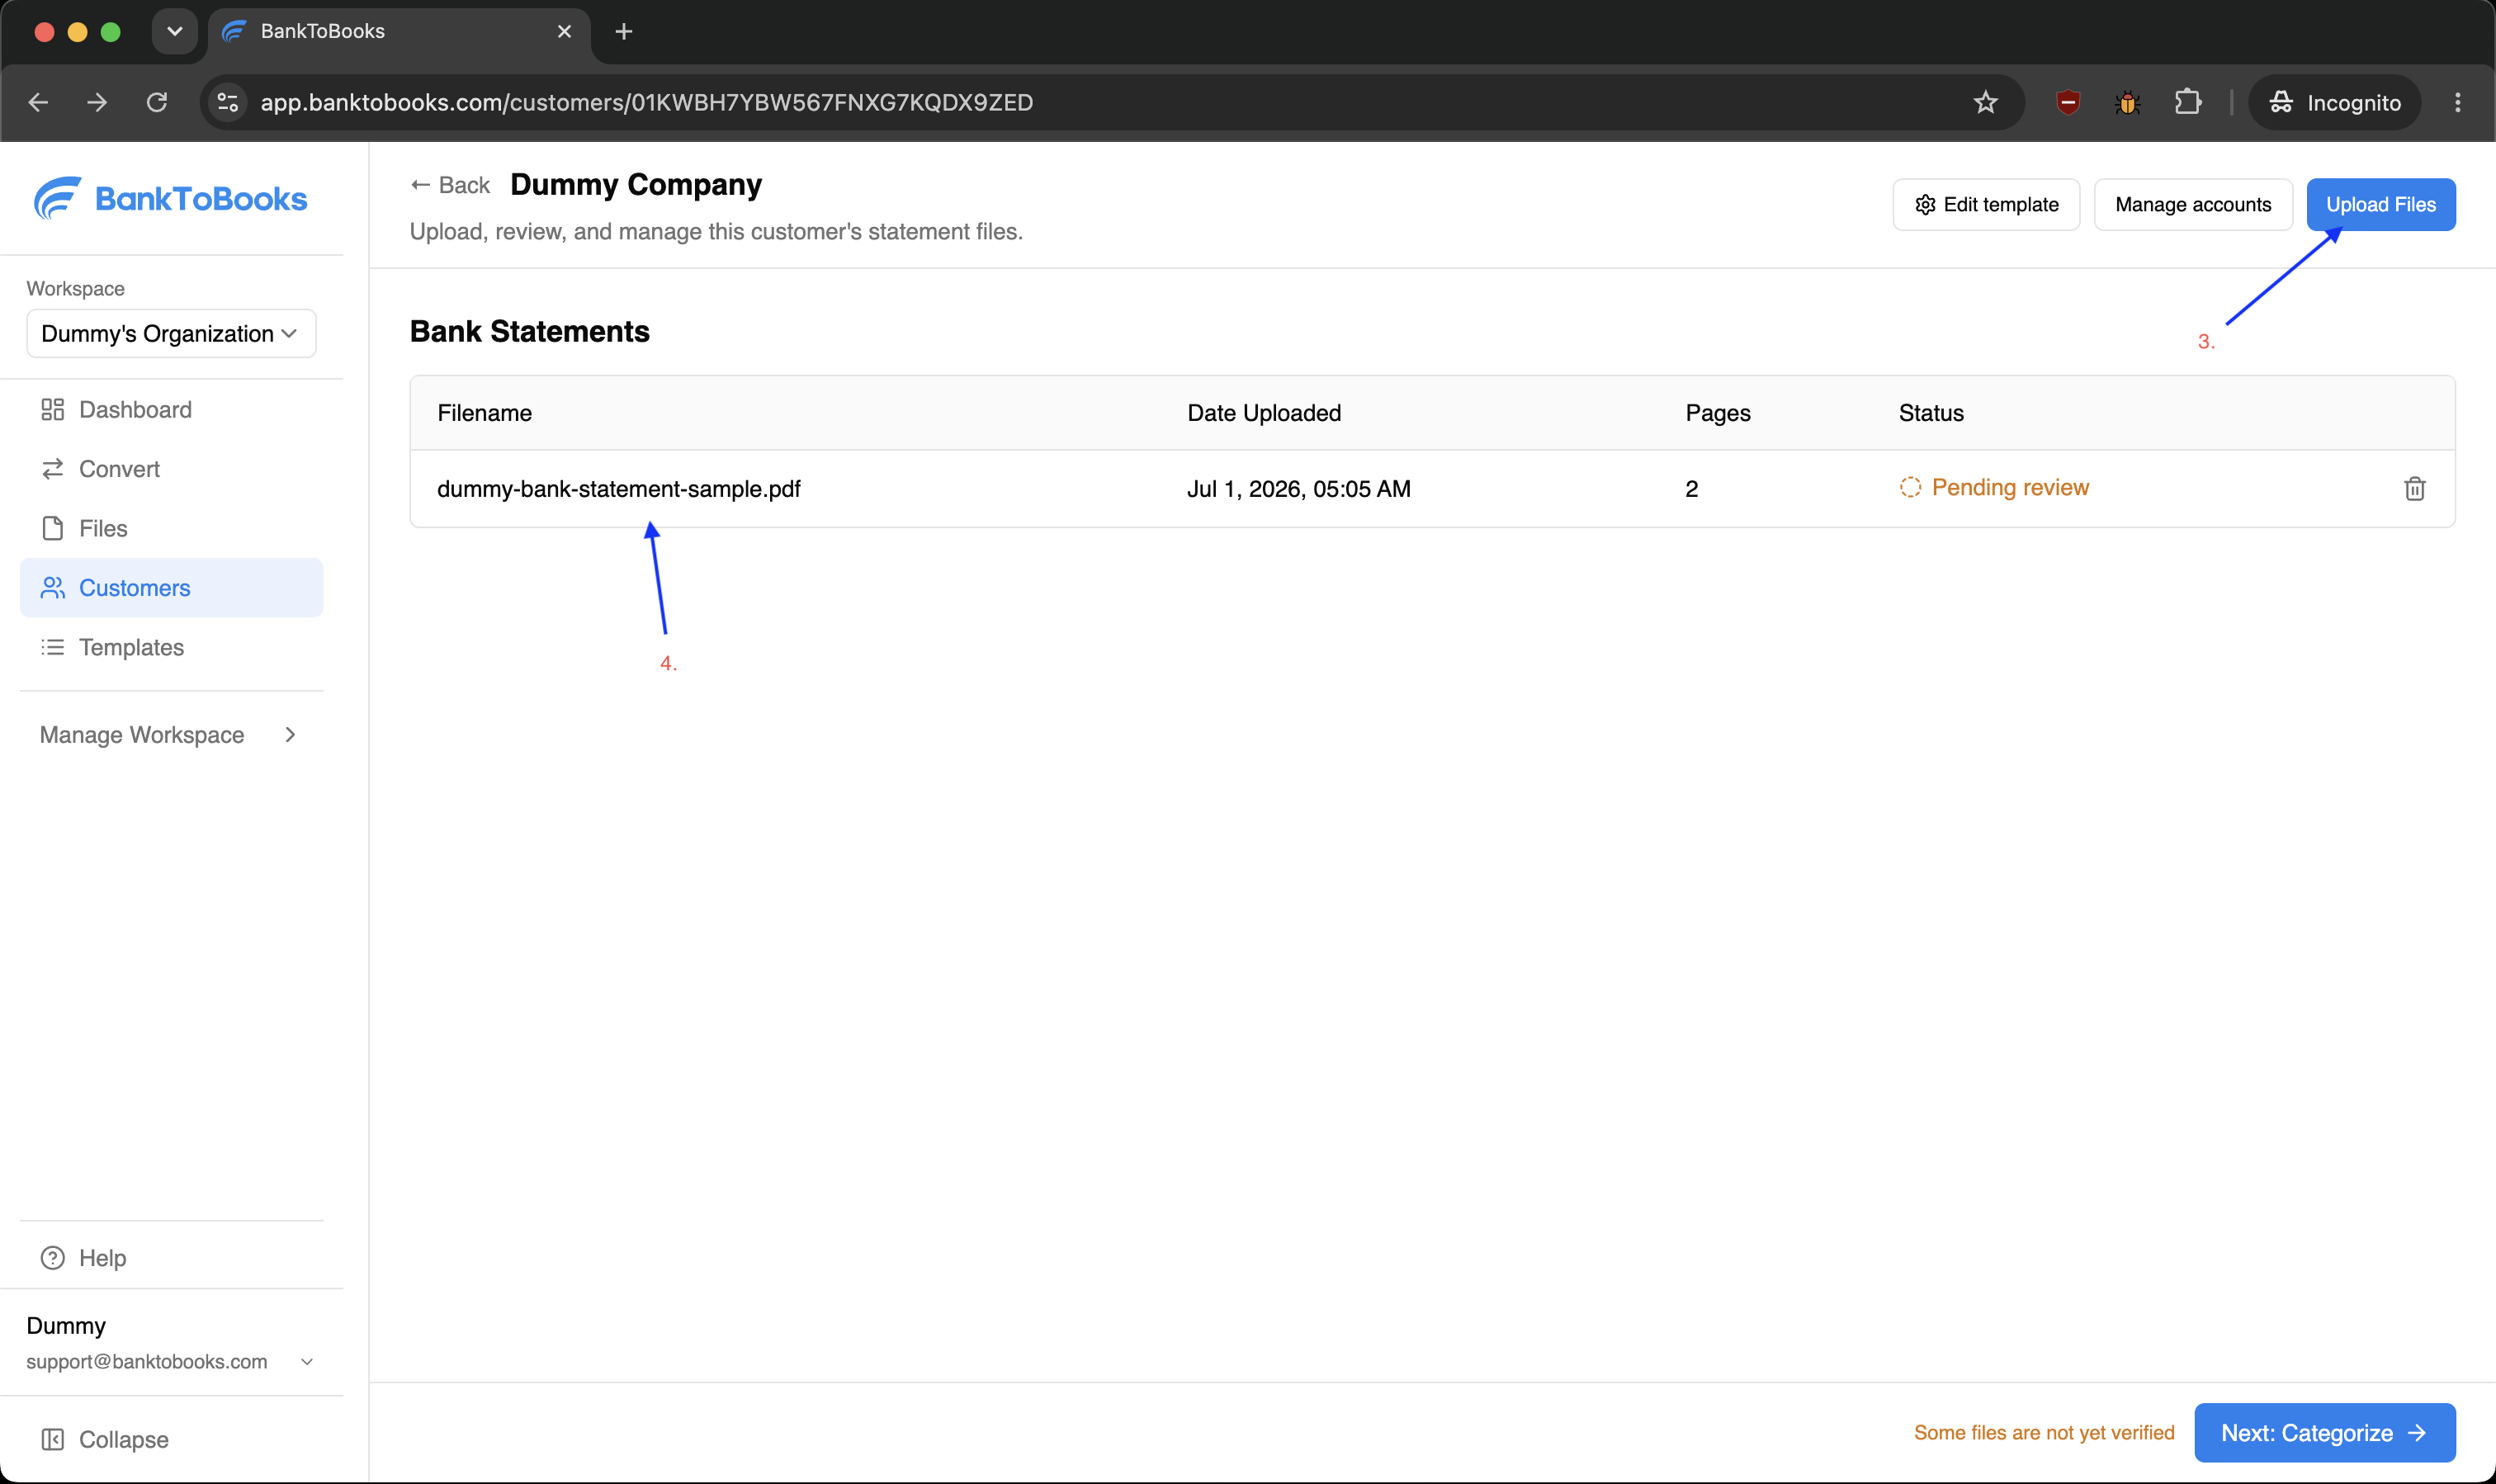
Step 2: From the customer record, click Upload Files or drag statements into the Bank Statements section.
After upload
Customer uploads keep the file connected to the rest of the customer workflow, so you can manage accounts, review extracted transactions, adjust categorization, and export reports from the same customer record.
After the upload finishes, each file appears in the customer record's Bank Statements table. Use the Status column to decide what needs attention next:
- Processing means BankToBooks is still extracting statement data.
- Pending review means the file is ready for verification.
- Verified means the file has already been reviewed and can move into categorization and reporting.
- Error means the file needs a retry or replacement before it can move forward.
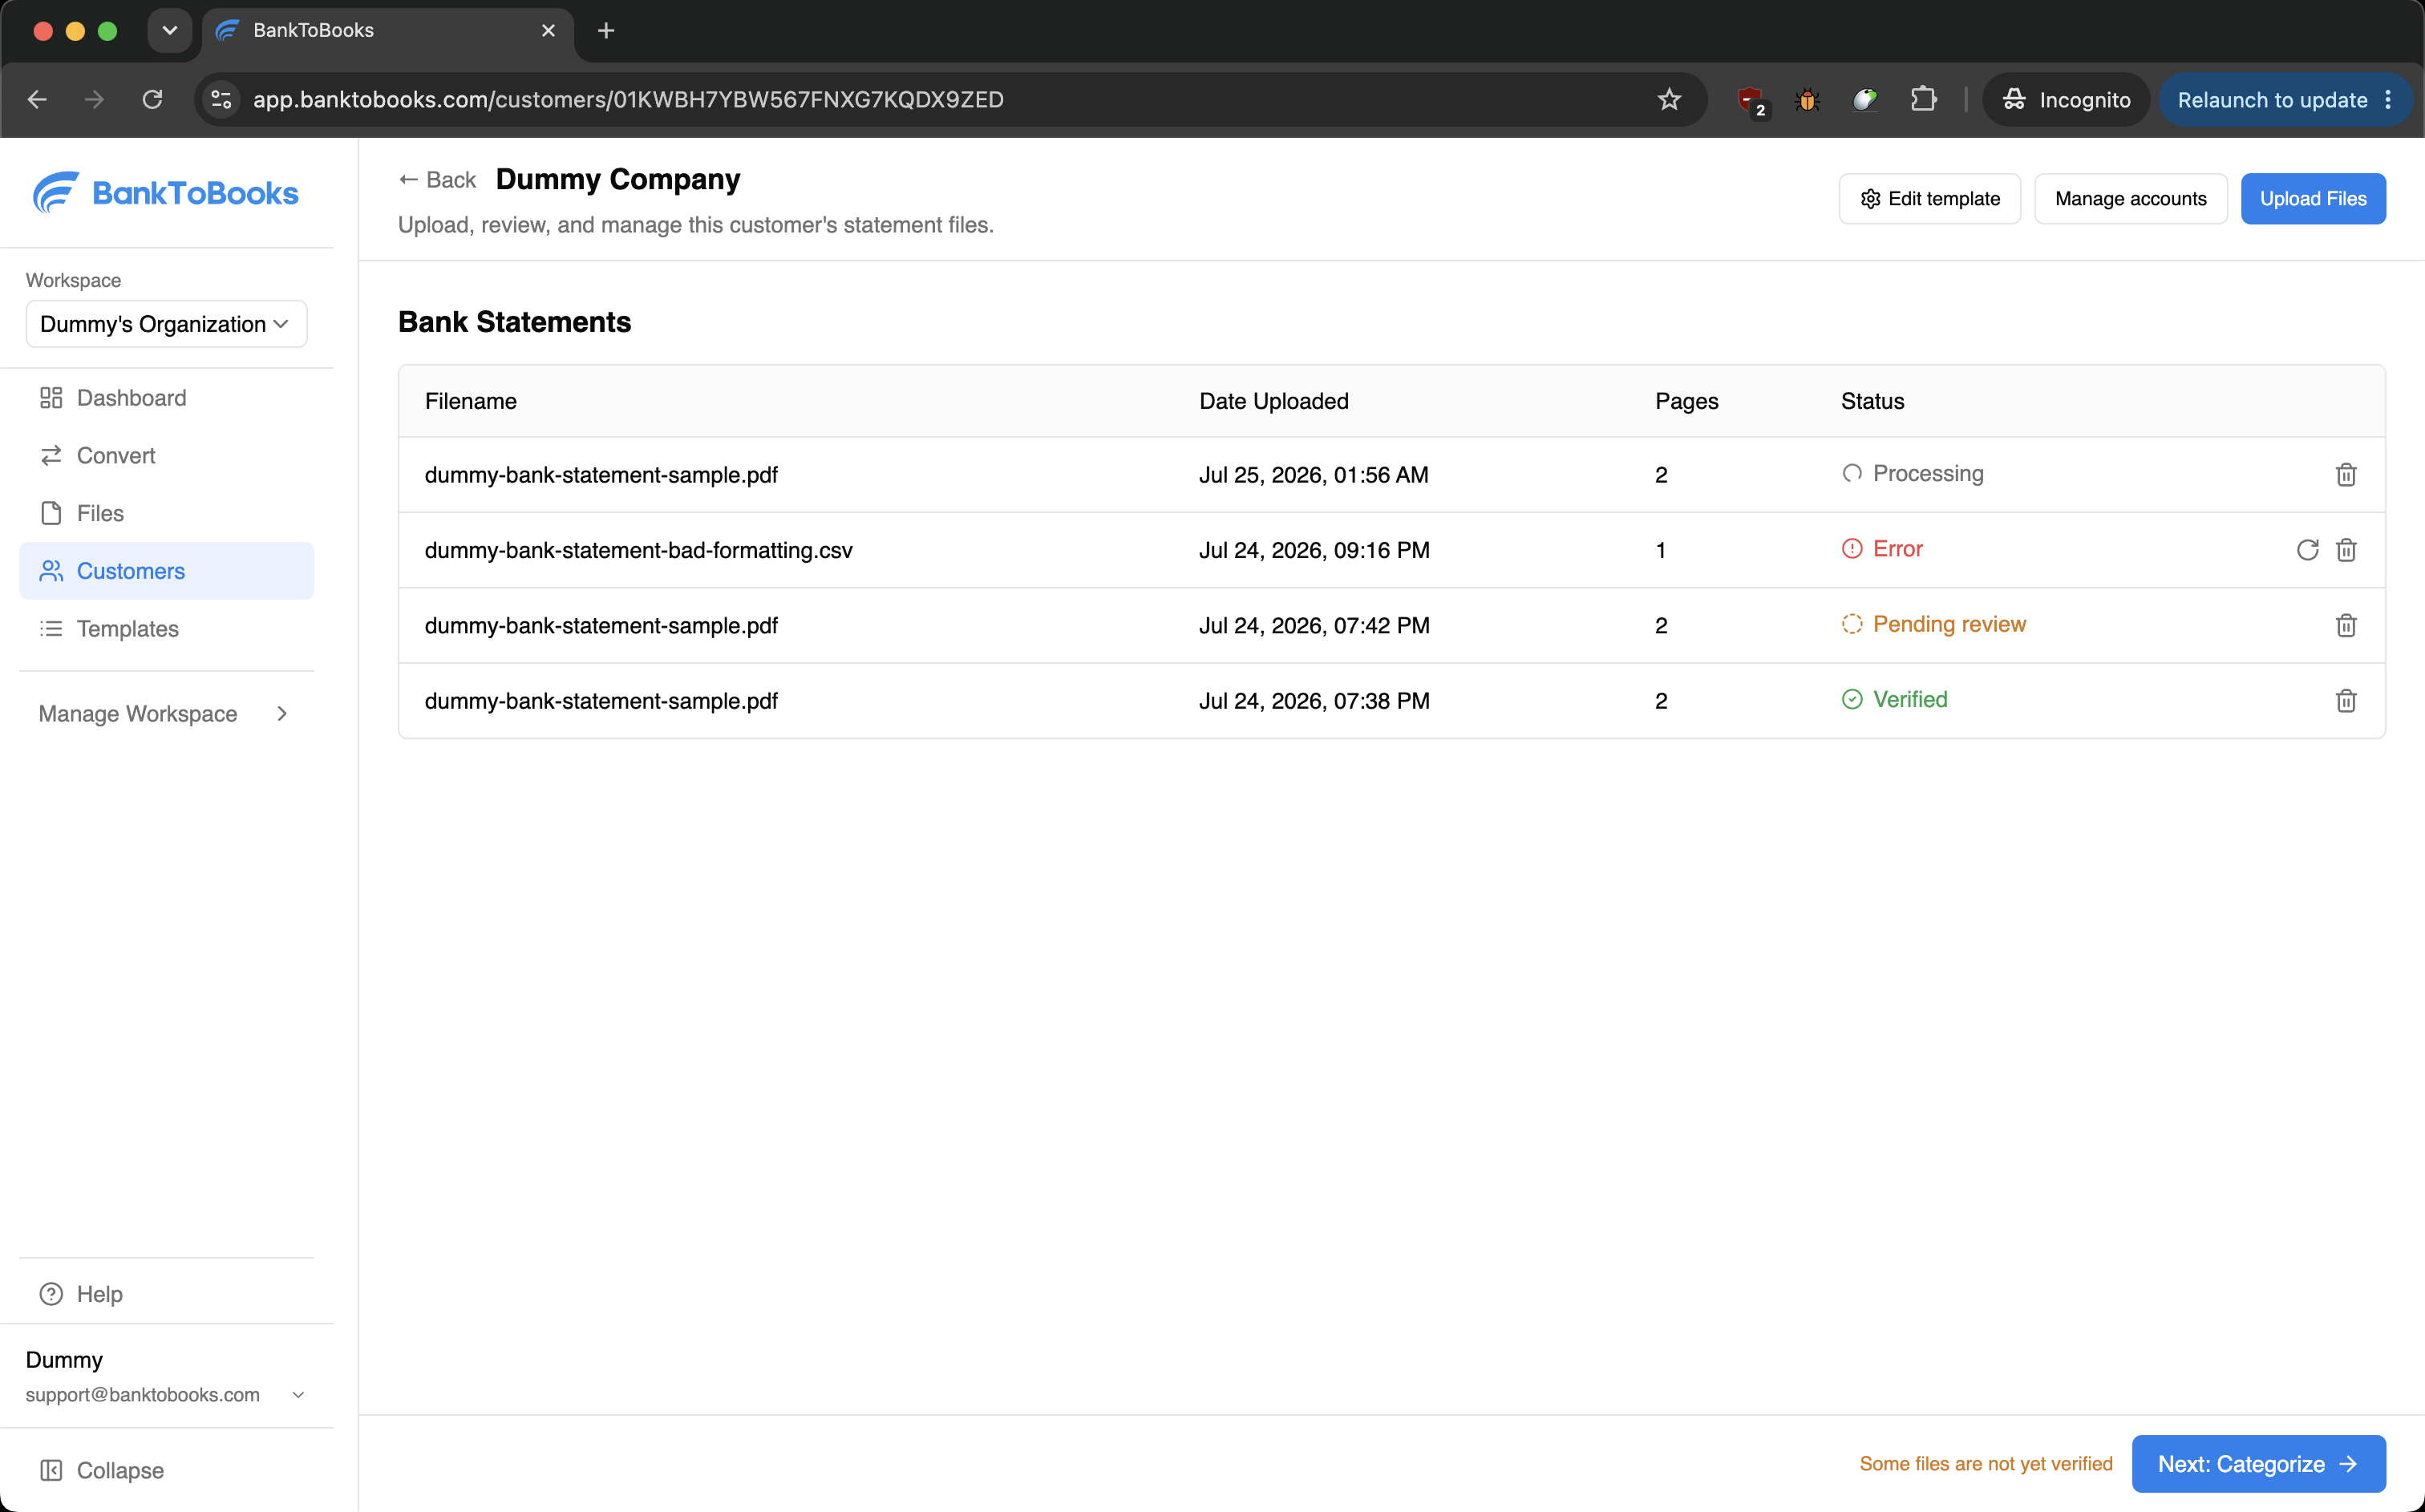
Review the file status table after upload so you know which statements still need processing, retrying, or verification.
Last updated: